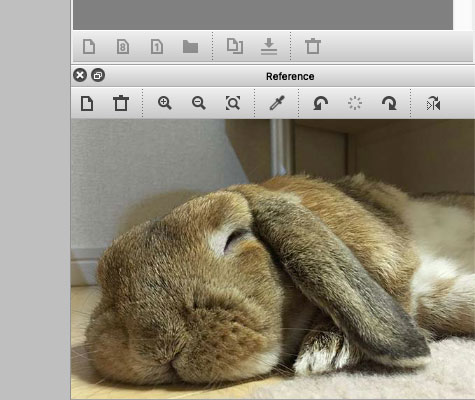
Image. Reference photo of a Buddha
If you view the reference picture with another software, when FireAlpaca is being used, the reference picture (displayed in the other software) will be hidden behind FireAlpaca. With the reference window, you can always keep it at the forefront (only when FireAlpaca is in use).
Open Reference Window
The reference window is not displayed as default. Select “Reference” from “Window” in the main menu to open it.
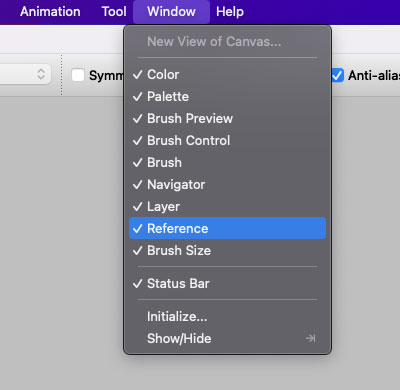
Image. Open reference window
Add/remove reference picture
There are two ways to add reference picture. The first way is to click on the leftmost icon and select a file. After that, select the picture you want from the file dialog to use as reference.
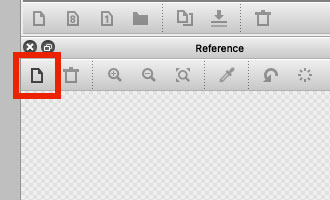
Image. How to open file in the reference window
Another way to add reference pictures is drag and drop. Drag and drop the file from your desktop or file explorer (Finder on Mac) onto the reference window.
To delete the picture, click the trash can icon on the second from the left. Don’t worry, the original file will not be deleted. It will only disappear from the reference window.
Display option
-
- To zoom in, click the magnifying glass (plus) icon.
- To zoom out, click the magnifying glass (minus) icon.
- You can also use the mouse wheel to zoom in and out.
If you want to move the picture, drag it with the mouse (or tablet) inside the window.
Eyedropper tool
Click on eyedropper icon to activate eyedropper tool (press again to cancel).
By using eyedropper tool, you may click on the reference picture to sample the color (set as foreground color). This function is useful when you want to use the same color as the reference picture.
Others
On the right of the eyedropper icon, there are:
・Left rotation icon (button)
・Reset rotation icon (button)
・Rotate right icon (button)
・Horizontal flip icon (toggle)
Notes
The reference image will be loaded automatically the next time you start FireAlpaca.
If the size of the reference image is very large (JPEG , PSDs and MDPs with few MB), it may take a long time for FireAlpaca to start. Don’t forget to use the trash icon to delete the picture when you don’t need it.


