The 3D Perspective feature, which allows you to snap to objects in 3D dimension (such as cubes), has been added in FireAlpaca 1.6.0. Before understanding the 3D Perspective feature, it is important to understand the snapping feature.
First, add 3D Perspective layer. Select “3D Perspective” from snap menu.
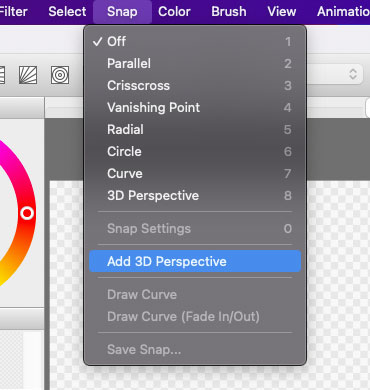
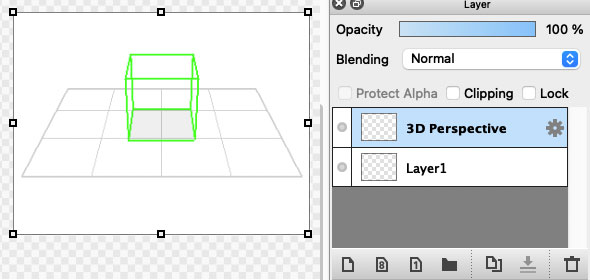
Image. 3D Perspective layer added
It must not draw lines or shapes on this layer. By using “Operation Tools” , you can adjust the size of this 3D perspective layer.
Select “Operation Tools” from the toolbar, drag it to adjust the size. You can also move it up, down, left or right by dragging inside the object.
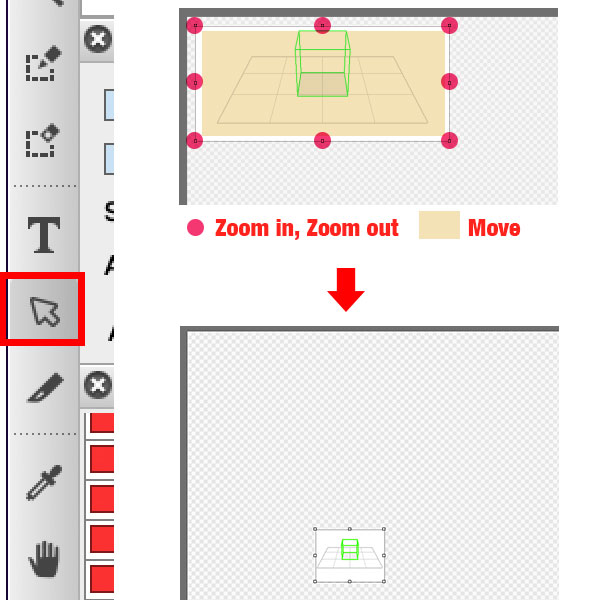
Image. Select operation tool, adjust the size
Now, edit the 3D space. Double click on “3D Perspective” from the layer list, and the 3D Perspective Edit dialog box will appear.
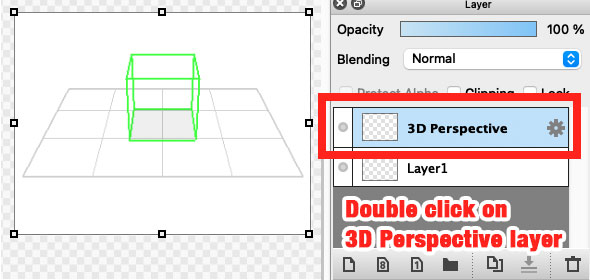
Image. Double click on 3D Perspective layer
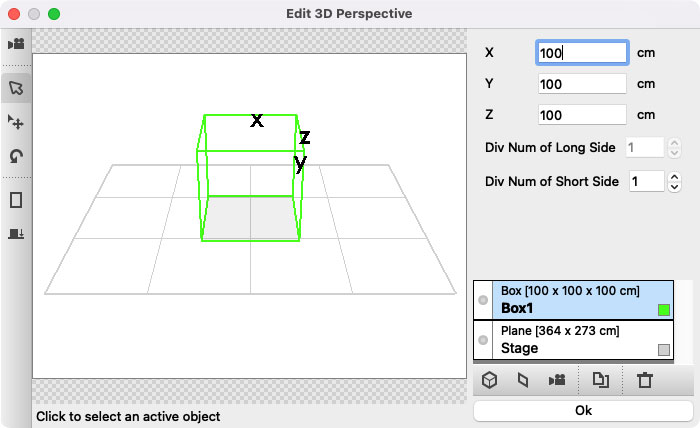
Image. 3D Perspective edit dialog – Use mouse to construct the 3D space.Initially, “Stage” and “Box1” objects are placed in the space. You can select the active object by clicking on it from the 3D view. You can also choose from the list on the right.
On the lefthand is “Tool Bar”. Click the Camera icon on the top and start the camera mode. (Press again to cancel it)
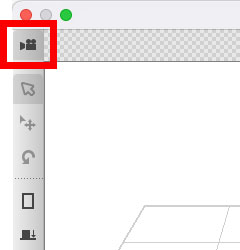
Image. Select camera modeWhat is camera mode? – Use your mouse and change your point of view.
What is viewpoint? – Show position and direction in one limited space.
- Drag (Drag left), Rotate (Shake head)
- Drag (Drag right), Change the position (Change the head position)
- Scroll wheel, Zoom in /out
It might take time to get used to it. Take it a try.
Image. Change viewpoint from different angle
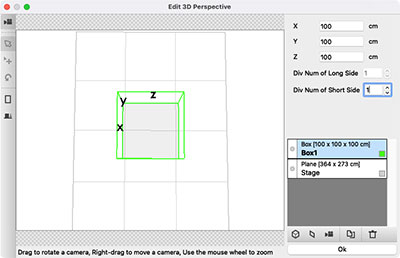
Image. Change viewpoint from different angle
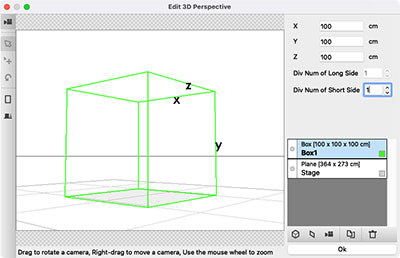
Image. Change viewpoint from different angle
You can save the viewpoint that you feel right. Any angle is easily to be changed, be sure to save the angle that you like.
At the bottom right of the list view, you can see a camera icon. Click it and add “camera object”. You viewpoint is stored by this object. Even though you change the viewpoint on the screen, you still can manipulate your saved data by selecting the object from the list.
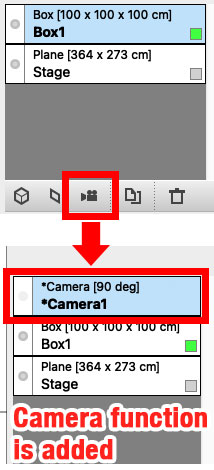
Image. Add cameraChange camera object to active status, and press “Refresh” button from the property panel of the project. The viewpoint of camera object will be renewed to the latest.
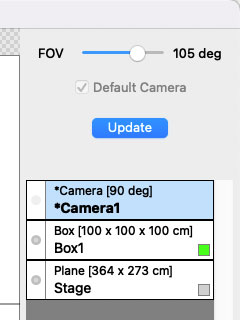
Image. Refresh button for viewpoint renewal
When you finish editing the 3D perspective, press “OK” button at the bottom right to close the dialog. If you do not want to save the file, you can click the Dismiss button in the upper right corner to terminate the editing process.
First, move the 3D Perspective layer to the bottom of the layer (you can also create a layer above the 3D Perspective layer). The 3D perspective layer must be placed below the drawing layer, because the drawing area will be hidden by the 3D perspective layer.
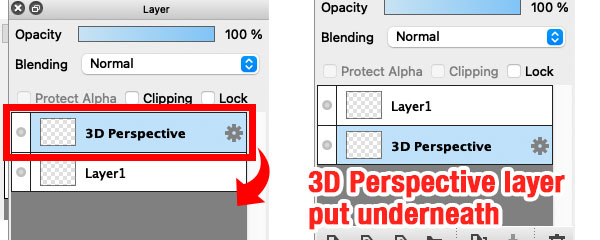
Image. 3D Perspective layer moved to downward
Let’s try the snap!!
First, choose the layer you would like to draw. (Suppose choose layer 1) and click on “3D Perspective Snap” from bar.

Image. Select “3D Perspective Snap”
●After clicking on the button, select “Which object you would like to put snap on?” Multiple objects can be placed at 3D space, so you can choose any of them.
As Parallel Snap, you could use ● button to select an angle.
As 3D Perspective Snap, you are to select object by using ● button.

Image. Press snap button [●] to choose the objectUnder snap setting button, hover on the canvas, select object in active, and click to decide. Inactive objects will be in opaque status.
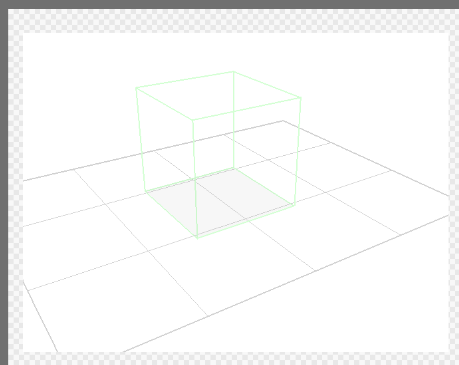
Image. Which object for snap?
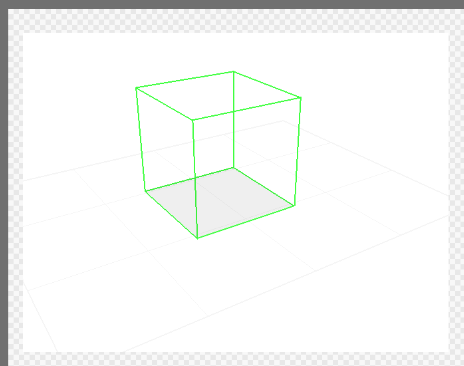
Image. Which object for snap?
Like any other brush, function of itself is for drawing on the layer. The nearest edge will be proceeded with the snap, brush will be put in effect. (Actually, it is snapped to the nearest edge along with the direction, drawn by the brush.)
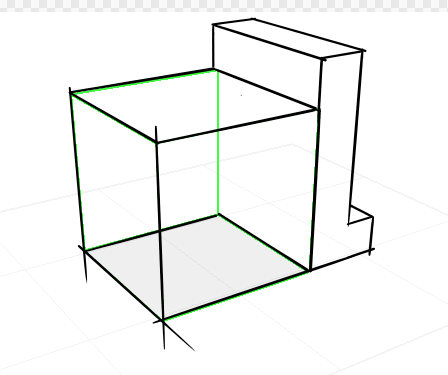
Image. Snap image
If you want to snap on different objects, press ● button once again.


